Events
Learn about the events in your tracking plan
An event represents a user action (for example: “Signup Started”) or something that happens in response to a user action (for example “Credit Card Validated).
In Avo, your events live under the Events section of the Tracking plan and can be organized into categories.
For strategies on organizing events alongside variants, properties, and metrics, see Organizing your tracking plan, including categories, tags, stakeholder teams, property bundles, and metrics.
Creating events
Avo provides several ways to create events efficiently, depending on your workflow needs.
Getting Started Resources
- Visual approach: Journeys for designing tracking using product screenshots with AI assistance
- What to track: Tracking Plan Guide: How to Pick Your Events and Properties
- Step-by-step tutorial: Data design deep dive for creating events on branches
Standard event creation methods
- Events view creation button: Click the “New Event” button at the top of the Events view
- Events Workbench: Create events inline by hitting “Add new event” in the bottom line of the workbench
- Command palette: Hit “C” on your keyboard and select “Event” from the command palette
- From metrics or properties: Create events in context from Metrics or Properties
Fast event creation methods
Fast creation methods are particularly useful when planning a new feature that requires multiple new events.
For creating multiple events quickly, Avo offers two streamlined approaches:
Batch creation with “Create more” toggle
When creating an event from the event creation modal, enable the “Create more” toggle (or use Ctrl+M) to stay in the creation flow after saving your event. This allows you to:
- Create multiple events in sequence
- Maintain your workflow momentum when planning event structures, for example through Metrics
Workbench quick creation
From the workbench interface, you can create events inline:
- Click into the bottom row of the workbench where it says “Add new event”
- Enter your event name inline
- Hit Enter to create and immediately add another event
- Use Tab to navigate between inline creation fields
Adding context with bulk editing
After creating multiple events using the fast creation methods, you can efficiently add context to all of them at once using bulk editing. Simply:
- Select multiple events in the events table (using checkboxes or Cmd/Ctrl+click)
- Use the bulk editing toolbar to add shared attributes like:
- Sources: Add the same sources to multiple events
- Event Properties: Attach common properties to multiple events
- Tags: Apply consistent tagging across events
- Categories: Organize events into the same category
- Stakeholders: Assign stakeholders to multiple events at once
Efficient Workflow Tip: This two-step approach (fast creation → bulk editing) is particularly effective when planning new features or conducting analytics workshops where you first capture all the events you need, then systematically add the detailed context. For detailed use cases and step-by-step guidance, see our Bulk Editing guide.
Defining events
In your tracking plan, an event definition will include:
- A descriptive Event Name
- A Description with information about the event beyond what the name includes (optional but highly recommended)
- Event Variants that include variations of the event for different scenarios (optional)
- Triggers that describe both visually and in words all the user or system actions that trigger the event (optional but highly recommended)
- Sources that the event should be sent from
- Actions associated with the event, including properties
- Metrics related to the event (optional)
- Stakeholders in your organization that rely on the event
- Owner: which stakeholder team owns the event
- Categories that the event is a part of (optional)
- Tags associated with the event
- Name Mapping that the event name is mapped to when sending to specific destinations
You can define events in several ways, depending on the scope of your changes and level of detail you need:
-
Inline Table Editing: Properties, categories and tags can be edited directly in the table by clicking on individual cells.
-
Bulk Editing: Select multiple events to apply bulk updates to shared attributes like sources, properties, and stakeholders.
-
Event Details Panel: Click into an event to access and define all aspects of the event.
Filtering and organizing events
The Events table provides powerful filtering capabilities to help you find and focus on relevant events, especially in larger tracking plans.
Available filters
- Stakeholders: Filter events by stakeholder teams that are assigned to them. This helps teams focus on events relevant to their domain.
- Owners: Filter events by the stakeholder team that owns them. Useful for seeing events a specific team is responsible for maintaining.
- Categories: Filter events by their assigned categories to see related events grouped together.
- Tags: Filter events by tags to find events marked with specific labels.
- Sources: Filter events by the sources they’re configured to be sent from.
- Destinations: Filter events by the destinations they’re configured to be sent to.
- Property Bundles: Filter events by the property bundles attached to them.
- Properties: Filter events by specific properties they contain.
- Actions: Filter events by the actions they’re configured to perform (e.g., Log Event, Update User Properties, Log Revenue).
Using filters effectively
For team-focused workflows:
- Use the Owners filter to see only events your team owns and is responsible for
- Use the Stakeholders filter to see events your team depends on but may not own
- Combine stakeholder and owner filters to get a complete view of events relevant to your team
For feature-focused workflows:
- Use Categories to see all events related to a specific product area
- Use Tags to filter for events related to specific features or initiatives
- Use Properties to find events that include specific properties you’re working with
- Use Property Bundles to see events that use shared property collections
For implementation-focused workflows:
- Use Actions to find events that perform specific actions (e.g., all revenue events, all user identification events)
- Use Sources to see events specific to a platform (web, mobile, etc.)
- Use Destinations to see events being sent to specific analytics tools
Sharing filtered views: After applying filters, you can share the filtered URL with colleagues so they see the same focused view of events.
Sources
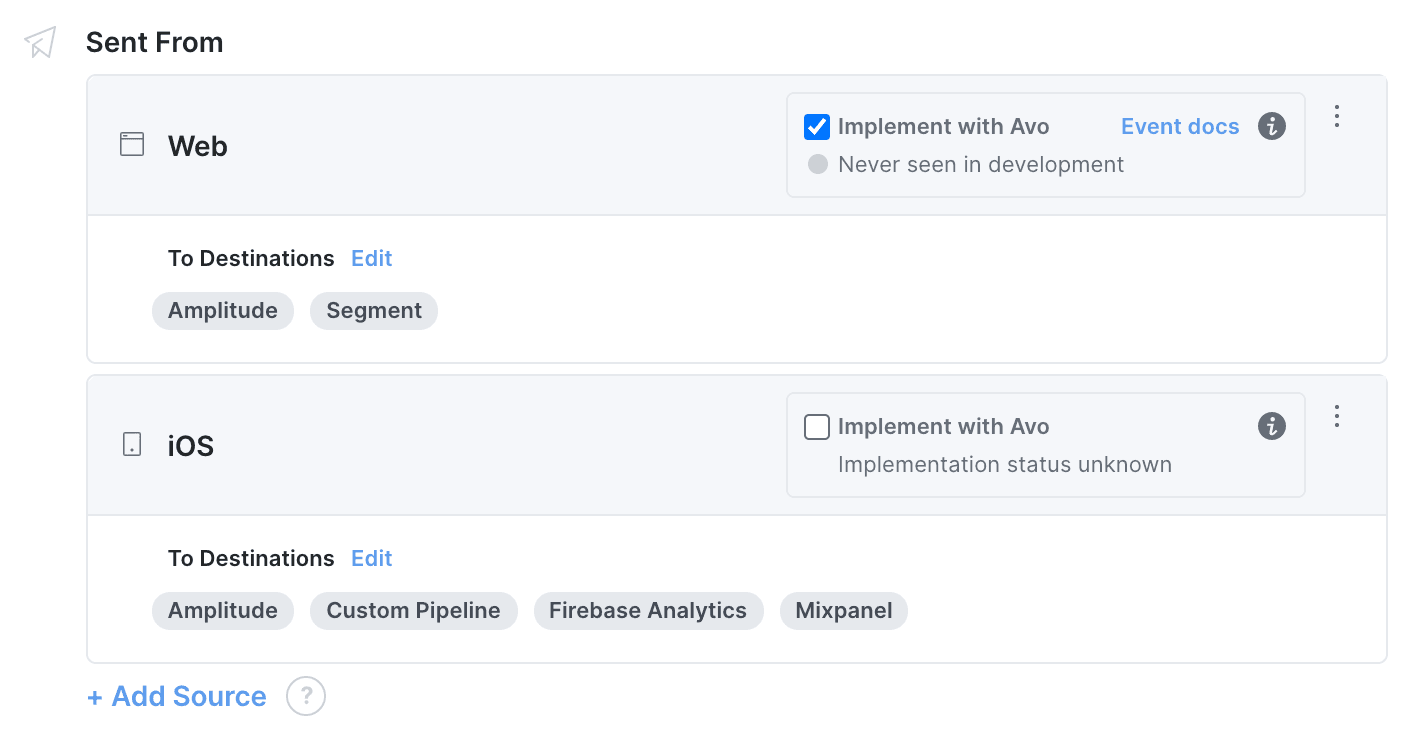
Add all sources you want the event to be sent from to the event in Avo. If you want the event to be implemented with Avo Codegen, make sure “Implement with Codegen” is checked. Having “Implement with Codegen” checked adds the event to your type-safe Avo Codegen file for that source. If you don’t want the event to be implemented with Avo Codegen, leave “Implement with Codegen” unchecked.

Actions
Actions is Avo’s umbrella term over all the tracking methods the analytics platforms offer, such as logging events, updating user properties, logging revenue, etc. In your Avo tracking plan you can configure which actions (tracking methods) should be triggered. Actions can be triggered on their own or together, for example it’s common to update user properties along with logging an event.
See supported actions (tracking methods) below.
Configuring Actions
Adding Actions
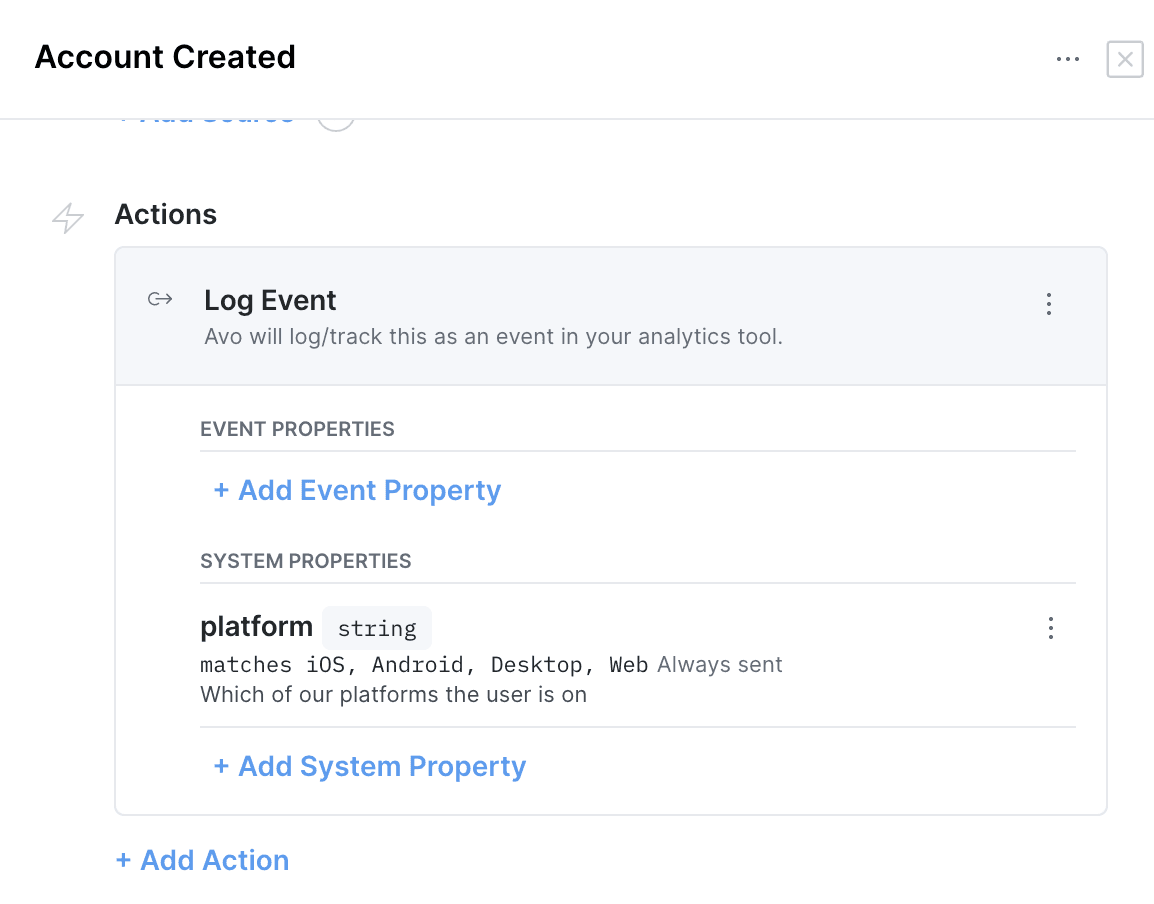
The default action when you add an event to your Avo tracking plan is to log an event.
To add an action, click +Add Action in the Event modal and select the relevant action:

Removing Actions
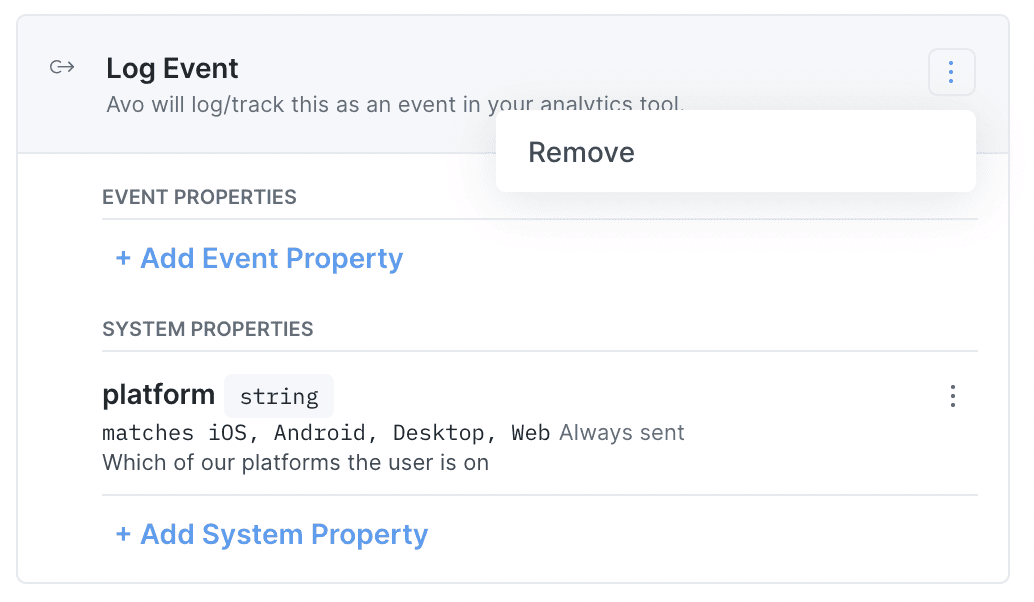
To remove an action, click settings in the Action and select Remove:

Supported Actions
Below is a list of possible actions, followed by a more detailed overview of each:
- Identify User: identifies the user in the analytics tool when sent. All events sent after this event will be tied to the identified user. Usually set on sign in events.
- Update User Properties: updates the associated user properties when sent.
- Log Event logs/tracks an event in your analytics tool.
- Log Revenue: logs revenue when this event is sent. Usually set on checkout events.
- Log Page View: logs page view in your analytics tool when this event is sent. Usually set on events that are sent on screen/page navigation.
- Unidentify User: unidentifies the user in your analytics tool when this event is sent. All events sent after this event will not be tied to the previously identified user. Usually set on sign out events.
- Update Groups: associates users with groups and/or updates group properties. Adding users to groups will link them in all subsequent calls.
- Push to Data Layer (coming soon): pushes data to the data layer when this event is sent.
Log Event
Logging an event is the fundamental action for behavioral analytics. An event describes an action that a user does in your application or something that happens for them. Additional information about the action, event properties, can be logged with the event.
When using Codegen, Avo creates one function for each event, that prepares all the required data to perform all associated actions and routes the data to the data destination. By doing so, Codegen makes your analytics as type-safe as possible, and takes care of sending the event to all your analytics tools.
Here’s how sending and event called “Signup Completed” would look like:
Avo.signupStarted({ authenticationMethod: 'Facebook', email: 'hi@avo.sh' });Log Event with Groups
When associating the event with groups you can imply that the event is linked with a group. This would typically be done if only certain actions of the user are related to a group.
With Codegen, groups are applied to tracking events with the following methods according to analytics platform:
- Amplitude: logEventWithGroups
- Mixpanel: track_with_groups
Identify User
The Identify User action should be used when you want to identify users from your system in your analytics platform. This would typically be on done when users either Sign up or Login or in other ways users are becoming authenticated users according your system.
The Identify User action can be triggered individually or along with logging an event. It’s common to trigger the Identify User action along with log Signup Completed and a Login Completed events - in such cases, the Identify user call should occur first and then the log event call.
In the Codegen when the Identify User action is selected, Avo will require a user property called
User Id. Below is a list of Identify User methods used for each supported analytics platform:
Unidentify User
The Unidentify User action should be used when you want to unidentify users from your system in your analytics platform. This would typically be done when users Log Out, but not limited to that.
If you forget to unidentify users in your analytics platform you could potentially track two or more users as the same user in your analytics platform if they share a computer.
Below is a list of Unidentify User methods used for each supported analytics platform:
- Amplitude: setUserId with User Id as null
- Segment: identify with User Id as null
- Mixpanel: identify with User Id as null
- Fullstory: identify with User Id as false
Update User Properties
The Update User Properties action is used when the state of the user in your analytics platform should be updated. User properties are often updated at the same time as logging an event but they can also be updated independently.
User properties are updated with the following methods according to analytics platform:
- Amplitude:
setUserProperties - Appsflyer: user properties not supported
- Facebook Analytics:
fbq('setUserProperties') - Firebase Analytics:
setUserProperty - Fullstory:
setUserVars - Intercom:
Intercom('update', userProperties) - Mixpanel:
people.set - Segment:
identify
Update Groups
Avo is equipped with a familiar user interface to define and maintain Group Types and their properties and updating Group Properties is as easy as adding an action to your Event. Read more about Groups here .
Users can be associated with groups (and all subsequent calls) with the following methods according to analytics platform:
Furthermore, group properties can be updated with the following methods according to analytics platform:
- Amplitude: groupIdentify
- Mixpanel: group.set
- Segment: group (links user as well)
Log Revenue
Some analytics destinations have revenue tracking separate from event tracking. Add the Log Revenue action to indicate that the event represents a successful purchase and should be used to track revenue. When using Avo Codegen this will result in your event function receiving an additional amount parameter that will then be passed on to the revenue function in your destination interface. Read more on it in the Codegen docs.
Log Revenue in legacy Codegen destinations
Below are details for what Avo Codegen automatically does for each analytics platform. Note that this only applies to legacy Avo Codegen destinations and does not apply to destinations using the destination interface.
Legacy Amplitude Destination
For the Amplitude destination, Avo will add 4 event properties that match the Amplitude logRevenue API with the prefix “Amplitude: ”.
- Amplitude: Product Id
- Amplitude: Quantity
- Amplitude: Price
- Amplitude: Revenue Type
Call logRevenueV2 with these properties as well as all other event properties, and then call logEvent.
Legacy Segment Destination
For the Segment destination, Avo Codegen will add 2 event properties that match the Segment revenue properties with the prefix “Segment: ”.
- Segment: Revenue
- Segment: Currency
Segment currency will have constraint that the currencies need to be in a valid ISO format. For compiled languages this will generate an enum to guarantee that the currency is a valid ISO format, for JavaScript this will be validated during runtime.
Enums are currently not supported on Android and iOS.
Call track with the Segment revenue properties set in the correct keys to make sure that Segment recognizes the event as a Revenue event.
Legacy Mixpanel Destination
For the Mixpanel destination, Avo will add 1 event property that matches the Mixpanel track_charge API with the prefix “Mixpanel: ”.
- Mixpanel: Amount
Call people.track_charge with the price and all additional event properties and then call track
Log Page View
Add the Log Page View action to include page tracking on web and screen tracking on mobile.
Log Page View in the Codegen
When Log Page View is set on events, Avo Codegen will do the following for each platform
Segment
For the Segment platform, Avo will add 1 property that matches the Segment page property with the prefix “Segment: ”.
- Segment: Page Name
Calls either page or screen (depending on your apps platform) with the Page Name property and then call track. If you want to only log a page view, not an event, you can remove the Log Event action from the event.
Push to Data Layer (coming soon)
Add the Push to Data Layer action to push data to the data layer when this event is sent.
While it’s not yet supported, you can use the “Update User Properties” action to signify that the event is pushing data to the data layer.