Name Mapping
Name Mapping is a powerful tool in Avo to customize how your events and properties are sent to different destinations. Continue reading to learn some of the use cases for name mapping and how to add name mapping to your events and properties.
How to use name mapping
Name mapping can be used to configure both event and property names to be sent as something different to specific destinations.
Adding name mapping to an event
To add a name mapping to your event:
- Open the event that you want to add name mapping for
- Click the three dots in the top right corner of the event details
- Click “Add Name Mapping” (if you can’t see that option in the menu your workspace might not have access to it yet. Contact us to request access)
- Type in the event name spelled like you want it to appear in the analytics destinations
- Select the analytics destination which you want receive this name mapping for this event
Adding name mapping to a property
Name mapping can be added to a property both globally such that it applies for all events the property is attached to – and locally such that it only applies to the event where it is configured on. In addition, property name mapping can be applied to a single destination at a time – or all destinations.
In the case where multiple name mappings are defined for the same property name, Avo prioritizes the name mappings such that the first available mapping in the following list is the one that is used:
- Event specific, destination specific
- Event specific, all destinations
- Global for all events, destination specific
- Global for all events, all destinations
Globally for a property
To add a name mapping to a property that applies to all events it’s attached to:
- Open the property that you want to add name mapping for
- Find the name mapping section located below rules and above the activity log in the property view
- Click “Add Name Mapping” (if you can’t see that option in the event menu, your workspace might not have access to it yet. Contact us to request access)
- Type in the property name spelled like you want it to appear in the analytics destination(s) for this property on all events
- Select the specific analytics destination which you want receive this name mapping for this property – or select all destinations for all destinations on this event to receive this name mapping
Locally for a property on an event
To add a name mapping to a property that applies to a single event it’s attached to:
- Open the event that you want the property name mapping to apply for
- In the event details, find the property you want to apply the name mapping to
- Click the three dots on the right side of the property
- Select “Add Name Mapping” (if you can’t see that option in the property menu, your workspace might not have access to it yet. Contact us to request access)
- Type in the property name spelled like you want it to appear in the analytics destination(s) for this property on this event
- Select the specific analytics destination which you want receive this name mapping for this property – or select all destinations for all destinations on this event to receive this name mapping
Use cases for name mapping
Name mapping is a powerful tool for many different use cases for events and properties. We have gathered some examples below
For Events
A single destination requires a specific event name
Some destinations require a specific event name for certain user actions that might not be according to your naming convention. Name mapping enables you to have a single event for all destinations and map the name to a different name when needed.
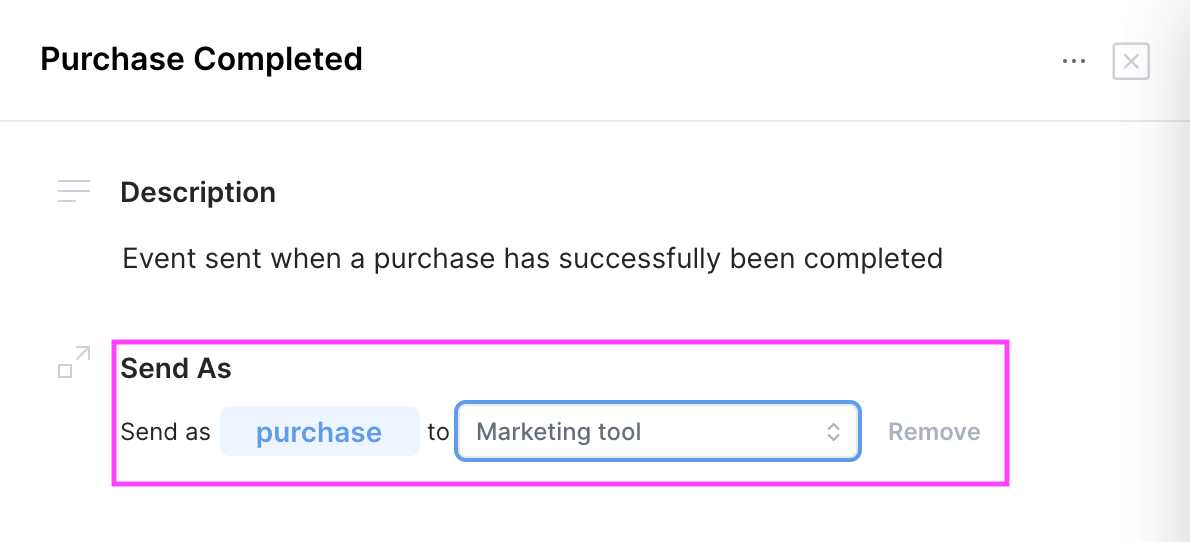
Example: A marketing tool requires the purchase event to be named “purchase”, but your naming convention is to spell event names in title case with an object and an action. Then you can name the event “Purchase Completed” in Avo and create a name mapping for the marketing tool such that the event is sent as “purchase” to that destination.

An event has different shapes based on scenarios
Some companies have multiple platforms or products and have complex event shapes that vary depending on platform, product or context. In those cases it’s useful to create multiple events in Avo for the different shapes, differentiate between the event names in Avo but send all of them as the same event name to your destinations.
Example: A company has three different apps where it’s possible to add things to cart. The shapes of the “Add to Cart” events varies a lot between the three apps as the same properties are not relevant for all of them. Therefore they have three “Add to Cart” events in Avo
- Add to Cart – Food App
- Add to Cart – Clothes App
- Add to Cart – Jewelry App

These events have some properties in common but some not at all. But the company wants to be able to analyze all the data together, to be able to compare the performance of the three.
For Properties
A single destination requires a specific property name
Some destinations require a specific property name for certain events that might not be according to your naming convention. Name mapping enables you to have a single property for all destinations and map the name to a different name when needed.
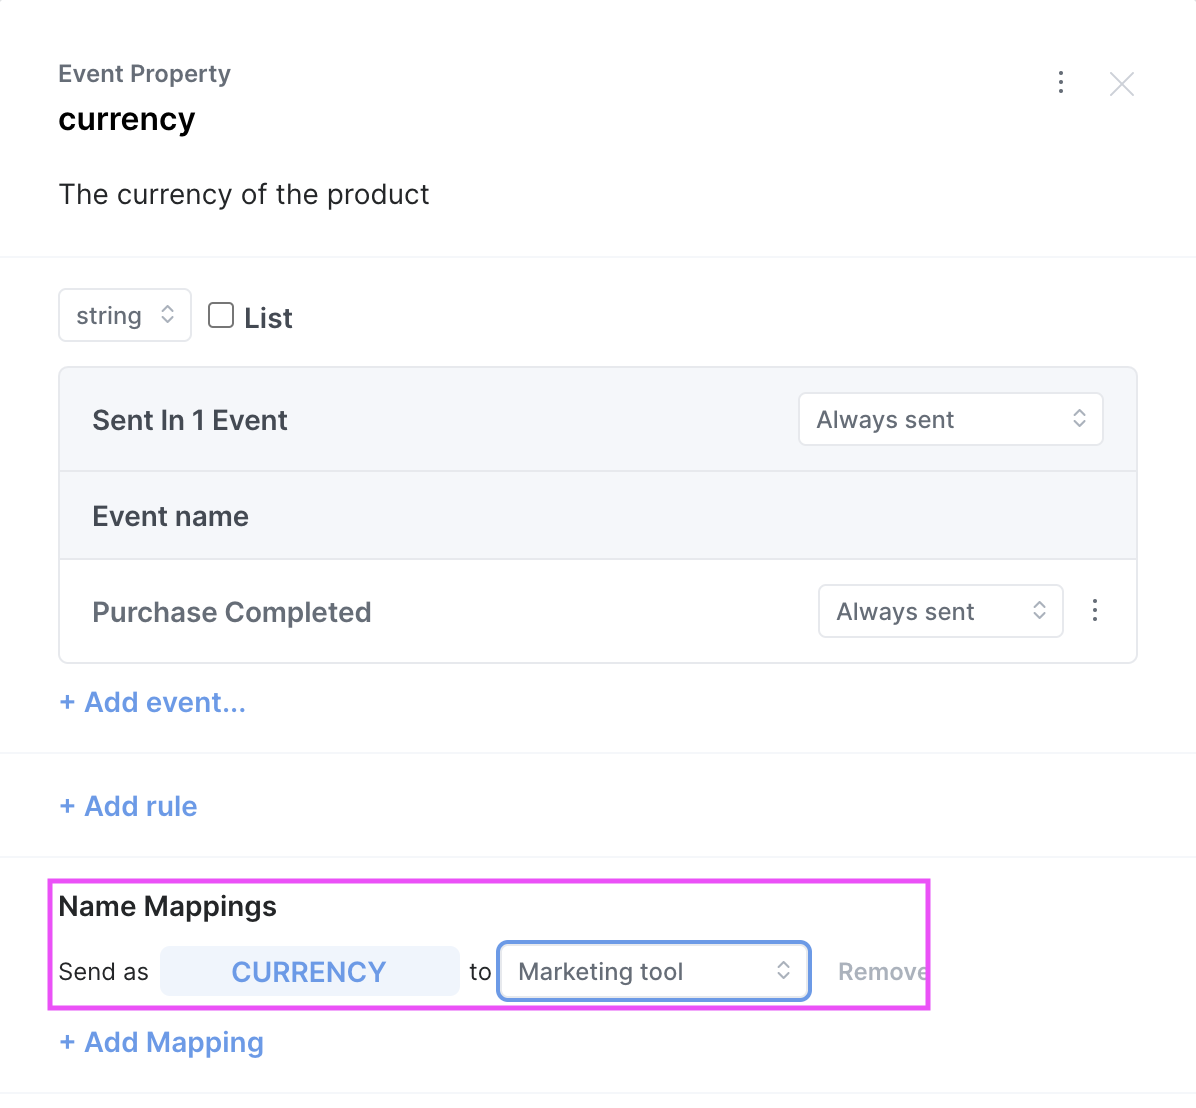
Example: A marketing tool requires the currency property to be spelled in upper case but your naming convention is to spell it in snake case. Then you can name the property “currency” in Avo and create a name mapping for the marketing tool such that the property is sent as “CURRENCY” to that destination.

A property has different definitions based on use case
Some teams use pretty general property names that are used in different context and therefore could have different descriptions, constraints and types. Name mapping is a great way to keep track of the different versions of such properties. Then you are able to define all the different properties in Avo with descriptive names and Avo will take care of sending them with the same name to all your destinations. That way you are able to manage the types, constraints and descriptions per use case and have a clear descriptive name for each property to make data design easier while having them all be sent with the same property name to your destinations
Example: A team has the property “source” can mean a few different thing depending on context: a source page on web, a source screen on mobile, the source where the app was downloaded form, etc. Name mapping can be used to create separate properties with separate definitions:
source_page- Description: The page that the user triggered the event from
- Value type: String
- Constraints: “Signup Page”, “Setting Page”, “Profile Page”, etc
source_screen- Description: The screen that the user triggered the event from
- Value type: String
- Constraints: “Signup Screen”, “Setting Screen”, “Profile Screen”, etc
source_download- Description: Where the user downloaded our app from
- Value type: String
- Constraints: “Apple App Store”, “Google Play Store”, “Hockey App”
Different property types should have the same name
Some teams have a history of having event and user properties with the same name before starting to use Avo. Avo encourages teams to use different names between property types as it can be confusing in the analytics tool to differentiate between the two properties. But to be able to keep history intact, then you can name the event and user properties differently in Avo, but send them with the same name to your destinations.
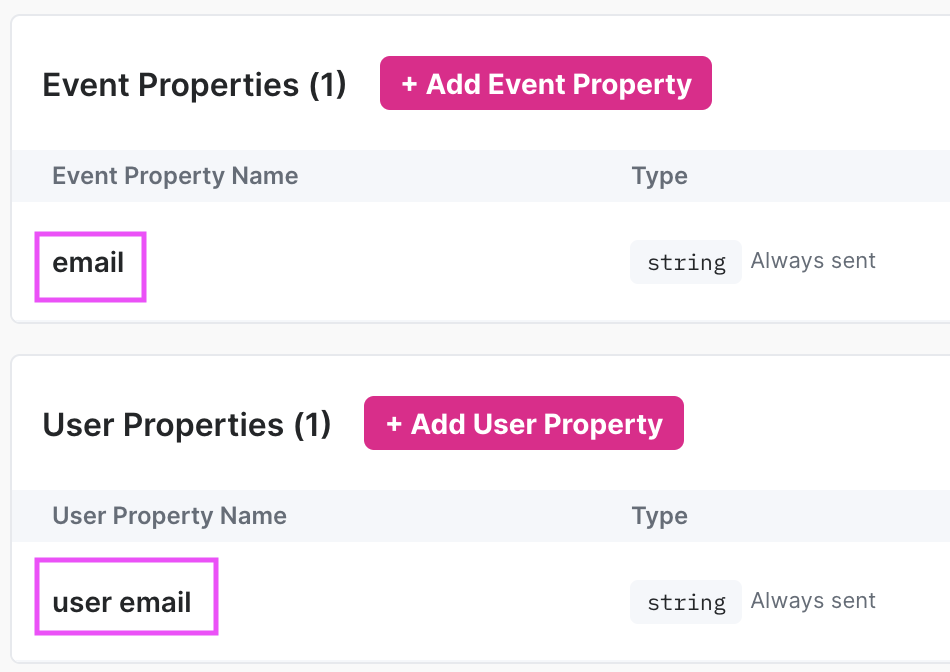
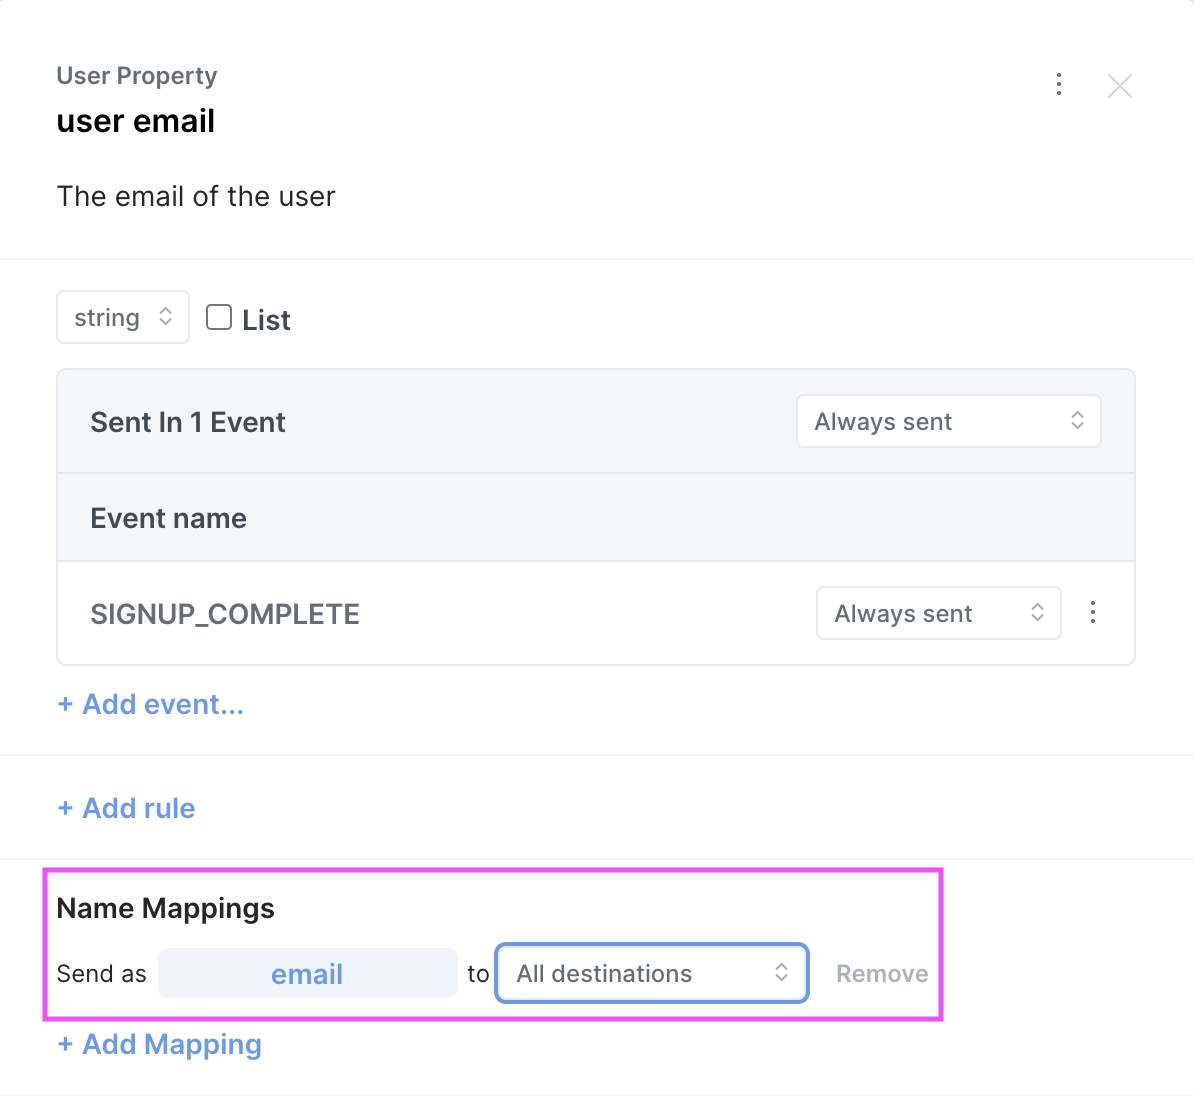
Example: A team has been sending email as a user and event property before adopting Avo. They want to continue sending both properties with the name “email” to all their destinations to keep history intact. So they name the event property “email” and the user property “user email” and add a name mapping to send it as “email” to all destinations.

